 Skip to content
 How to Recover Data
How to Recover Data hard drive
Recovering data from your hard drive requires strategic steps. When facing software data loss, avoid using the drive immediately to prevent data overwrite. Shutdown the connected machine, make a clone of the drive, and attempt recovery from it. Understand the components, such as PCB, platters, and firmware, for tackling common failures. For more serious issues like clicking noises or beeping sounds, consult a data recovery professional.
How to Recover Data from your hard drive
It has happened to me a few times, and I am pretty sure it happens to others too. Just imagine: you’re busy working on your computer, need to access documents saved on your external hard drive, connect it, get ready to find your data, and… nothing happens. Your hard drive isn’t working. Uh-oh. Before you panic, there are several things you can try on your own before calling in the pros. I strongly advise that when you encounter any problems like this with computers, just slow down and do not panic. Here at PC Plus Computing, we can help you fix these errors and provide you with tips.
Data loss can be due to a number of factors, but two are the most common. The first is software-related: accidentally deleting an important folder, emptying the recycle bin, or formatting the wrong drive by mistake. The second, and probably the most common cause of data loss, is a fault with the hard drive itself. Given the complexity of modern drives, it’s no wonder that somewhere along the line, something will go wrong. When the drive suffers from some form of failure, there is often little that you can do yourself to get the data back—professional data recovery services are usually required. However, there are certain failures that you can attempt to resolve yourself.
How to Recover Data from your hard drive?
When dealing with a software data loss, the first and most important thing to keep in mind is not to work with the drive in question. Every second that the drive is connected to a running system is a second that you lose your chances at recovery. Your operating system is reading and writing to your drive constantly, whether you are actively doing something or not. Now that your system is seeing the deleted data as ‘free space’ it will happily overwrite this area—along with your chances of recovery.
Shutdown the machine connected to the drive you have deleted data from. Now that your drive is ‘safe’ you can make a clone of the drive and attempt the recovery from the clone. There are a number of ways to clone the drive, some easier and quicker than others.
How to Recover Data When Your Hard Drive
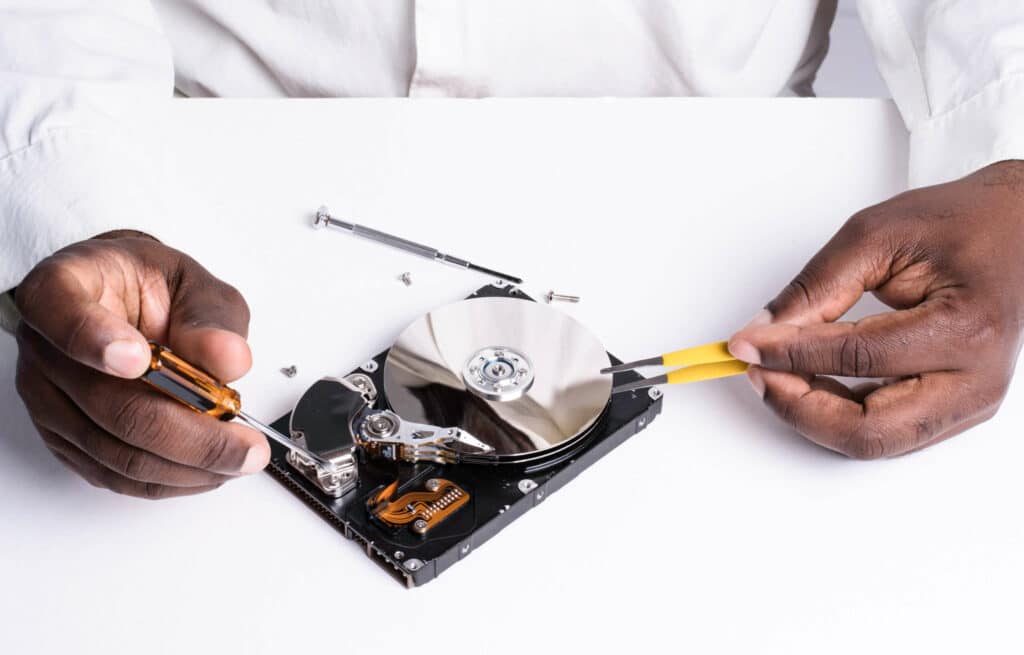
Hard Drive and its Internal Hard drive Parts
The basic components of a hard drive with top cover off and PCB removed.
Recover Your Data with Hardware
Having covered the ‘deleted data’ section of data recovery is all good and well, but what happens if your drive is not even being detected by your machine? Or your machine can see the drive, but just hangs when you try to access it? What about if the drive is completely dead and won’t even spin up? Let’s briefly cover the main components of a drive, see which components can fail, and what symptoms each failure might exhibit.
PCB Board
PCB: This is the (often green) circuit board attached to the bottom of your drive. It houses the main controller (the equivalent of your computer’s CPU) along with many other electronic controllers. This is the interface that turns your 0s and 1s from the platter into usable data that your computer can understand.
Hard Drive platter
Platters: Your drive contains one or more thin, circular platters. These spin around at anywhere between 5,900rpm to 7,200rpm on consumer drives and are the media that actually store your data. Made of glass or some form of alloy and coated with a magnetic layer, they can store anything up to 4TB of data.
Head assembly: Data from your drives`s platters is read by means of a series of read and write heads. While in operation, these heads are not actually in contact with the surface of the platters. In fact, they ‘fly’s manometers above the surface of the disk, reading and writing data. Typically a drive will have 2 heads per platter, so a large capacity drive with 3 platters will be paired up with 6 heads, one for each side of each platter. If these heads fail physically or the drive is dropped or knocked over, the drive can experience a ‘head crash’s where the heads no longer fly over the platters, but instead make contact with the surface and destroy your data at a few thousand revolutions per minute.
Firmware: Your drive runs its own mini operating system in order to deal with all of the data and operations required to access it. Most of this firmware is stored on the platters. A small portion is stored on the PCB, which is required when the drive starts up. Firmware can go wrong, leading to inaccessibility of your data. Unfortunately hard drive firmware is not similar to your mobile phone or tablet—you cannot just update or reflash it. Each drive has its own unique modules and parameters and is highly complex in nature.
Now that we understand the basic components of a hard drive let’s look at some common failures and symptoms you might experience, determine which component could be causing the problem, and see if we can tackle some of these problems DIY style.
If Your Drive Isn’t Spinning Up At All
This is the one instance where you have a relatively good chance of resurrecting your drive if you ‘re prepared to put in some time and effort. If the drive does absolutely nothing when you apply power to it (no noises at all), it is 99% a PCB problem. With older drives, you could sometimes find a matching PCB from another matching drive, swap it over, and voila. However, on new drives, technology and architecture have changed and each drive contains microcode unique to the drive it’s attached to. Simply swapping the PCB with a matching, working equivalent has almost no chance of working and can be outright dangerous to your data.
There are two main causes of failure here, either a TVS diode (fuse) has shorted due to over voltage, or a vital component on the PCB has failed. Hard drive PCBs often have two TVS diodes which act as fuses to protect your drive in the event of a power spike. There will most likely be two of these: one for the 5v and one for the 12v rail. If you accidentally plugged in the wrong power adapter to your external drive, or you experienced a power surge, a TVS diode might have sacrificed itself. If the shorted TVS diode is the only casualty and the rest of the PCB components are OK, then simply removing the shorted diode is enough to bring the drive back to life.
You can test this with a multimeter—if the diode reads zero ohms, or close to it, then it has indeed shortened. When shorted these diodes often have a noticeable burnt smell and might have visible burn damage. Note that when a TVS diode is removed the drive is no longer protected, so ensure that the power supply you connect to the drive is correct and healthy.
How to Recover Data When Your Hard Drive
PCB Board
A PCB with the TVS diodes highlighted
If the TVS diodes don’t smell burnt and show the correct digits when measuring them, then the problem is the PCB itself. A replacement PCB is required, but not just a straight swap. There is an 8 pin ROM chip on most PCBs that contains unique firmware info that is required to start up the drive. This needs to be moved from the old PCB to the new in order for the replacement to work. Some hard drives, especially Western Digitals, do not have this 8 pin chip—the firmware is stored in the main controller which is virtually impossible to move.
If you want to replace the PCB then you ‘ll need to fine a matching replacement and have the ROM chip moved. There are many online providers that will sell you a matching PCB. Some of them even offer to move the ROM chip for you, saving you the hassle of soldering and possibly damaging the chip. If the PCB was the only damaged component and the drive’s internals are OK, then after the replacement and ROM swap, your drive should be up and running again. Another PCB-related item to check are the head contacts. Sometimes they corrode with time, but are easily cleaned with a rubber eraser.
How to Recover Data When Your Hard Drive
Pictured: The contacts on a PCB can cause problems when they become tarnished like this.
If Your Drive Is Spinning Up and Making Clicking Noises
This is a serious failure and indicates a failed head or heads. It could also mean that your drive has suffered from platter damage if a head crash has occurred. Either way, this is a job for the pros. The drive will need to be opened in a clean room environment in a lab and a replacement head assembly fitted in order to try and recover your data. If your drive is clicking, it’s best power it off and leave it in this state until you can send it to a professional recovery company. Powering it up in this state could degrade the disk further, to the extent that it\’s no longer recoverable.
How to Recover Data When Your Hard Drive
Pictured: A hard drive that experienced a head crash and made a deep scratch. This can render a drive unrecoverable.
If Your Drives Spins Ups and Is Detected by Your Computer, But Hangs When You Try to Access It
This usually means that the magnetic media is degraded. Basically, there are a large amount of bad sectors that the drive is trying to read, failing to do so, and hanging. This is a common problem that occurs over time and can be worked around, but only with professional data recovery equipment, more specifically a hard imager. If you look at the SMART values of the drive you’ll notice and large amount of reallocated sectors to confirm your suspicions. If the data is important then send it off to the pros.
If you want to have a crack at it yourself (and risk making the problem worse or losing your data altogether) then you can try a software imager that can work around bad areas. Seeing that software commands ultimately goes through the BIOS, the effectiveness is limited. The best option if you want to go this route is a free Linux application called dd_rescue. It can skip bad areas and image in reverse.
If Your Drive Makes a Beeping Sound When You Power it Up
The beeping sounds you are hearing is the motor trying to spin the drive up and failing to do so. This is caused by one of two things, both serious mechanical failures. The most common is what’s known as stiction. The heads of your drive park either in the center or on a ramp at the edge of the drive when not in use. Remember, the heads don’t make contact with the data area of the platters, they fly just above. Sometimes, the heads can fail to park properly and the platters stop spinning with the heads still over the data area. Because of the extremely smooth surfaces of both the platters and heads, they literally stick to each other, hence the name stiction. The drive needs to be opened up in the lab, heads carefully removed and most likely replaced, definitely not a DIY job.
How to Recover Data When Your Hard Drive
Pictured: The head assembly with drive turned off and heads in the parked position. With stiction, they would be stuck somewhere on the platters.
The other cause could be seizure of the motor spindle. This is the spindle around which the platters rotate. It can become seized if the drive suffers a hard knock or drop. It’s not a particularly common fault, except for Seagate drives as they have a particularly fragile spindle. There are two ways for this problem to be resolved, both of which require pro intervention. Either the spindle can be replaced or the platters are moved to a new hard drive casing along with heads, PCB, the works.
If Your Drive Sounds Normal but is Not Detected, or is Detected as the Wrong Capacity
This normally indicates a problem with some area of the firmware. Either it\’s not being read properly which could actually be head problem, or there is some corruption that needs to be resolved. A few years back there was a well-known bug with Seagate 7200.11 drives with firmware version SD15 known was the BSY bug. Googling this provide a wealth of info of the huge amount of failures were caused by this firmware glitch. There was a DIY solution for this particular problem, but with today’s drives there is nothing that the end user can do but to send your drive in for professional help.
So, there are a few instances where you can attempt to recover your own data. If you’ve accidentally deleted your data then you might be in luck. If the drive is completely dead and won’t even power up then you could go the DIY PCB route if you wish to tinker. Other than that, if your drive is making unusual noises or acting in a peculiar manner, you’ll need to hand it over—together with some hard earned cash—to a data recovery professional. Remember, ANY attempts at data recovery are risky. If the data is important, take it directly to the professionals. Call us now 604-760-1662
Here is some tips you can follow for data Recovery
Tip #1: Use your system as little as possible until you recover all of your lost files. The more activity taking place on your hard disk, the greater the chance that some of your lost data might be written over.
– Don’t copy any files to the disk containing your lost data;
– Avoid browsing the web, because your web browser saves cache files on the disk;
– Don’t launch any unnecessary programs, because they can also use your disk;
– Don’t restart your computer.
Tip #2: Before you go further, take steps to free up some space on the disk containing your lost files. The more free space your system has, the less chance of overwriting any lost files with new ones. You can do one or more of the following things.
– Delete old files that you don’t need anymore (you can also move them to another source, like a USB flash drive, instead of deleting);
– Empty your Recycle Bin – making sure that you haven’t put any important files in there by mistake;
– Empty your browser cache. For Internet Explorer, click on the “Tools” menu, then select “Internet Options”. Then, on the “General ” tab, click the “Delete Files… ” button.
Tip #3: To install any software after data damage increases the risk of your data being overwritten, so if you haven’t had any data problems yet, consider installing a data recovery program just in case. Prevention is always better than cure, and a recovery program is good insurance for your data. However, if you don’t yet have a recovery program, find one and – if possible – avoid installing it to the disk where your lost files are located.
Most recovery programs work fairly similarly. You need to select the disk where the lost files are located, let the program analyze the content of the disk – this can take a while – and then select the file you want to recover. Then, provide a location where you want to save that file. You should try to avoid recovering files to the same disk. You could use another hard drive, a network or removable media like a floppy disk or USB flash drive.
Best Solution is call Data Recovery Specialist like PC Plus Computing Inc ASAP